Homemade Bluetooth headset circuit diagram
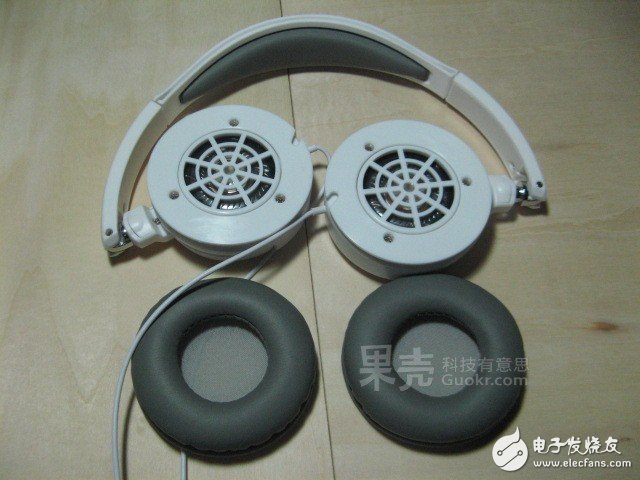
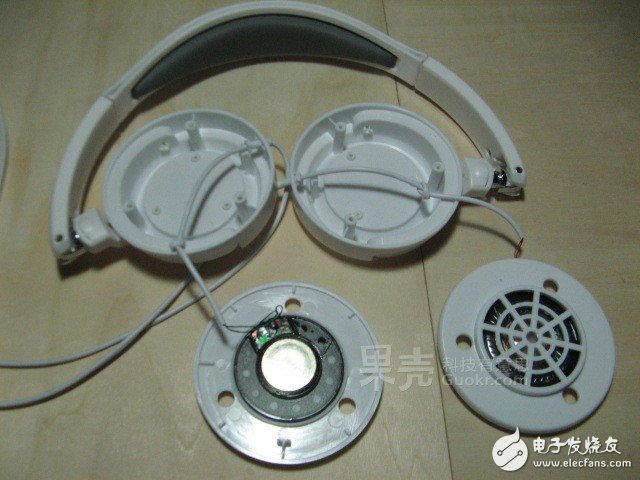
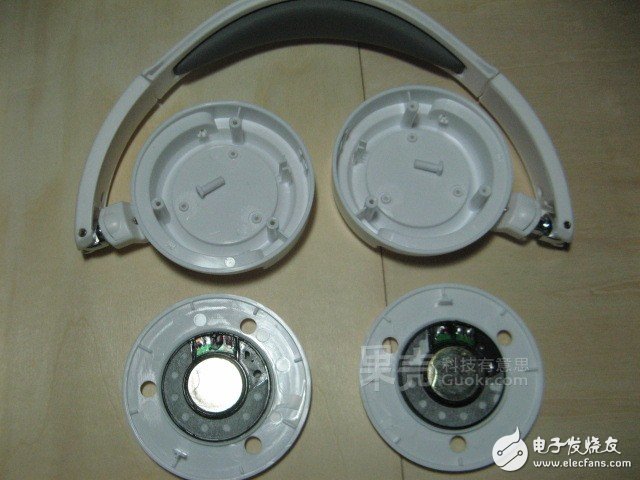
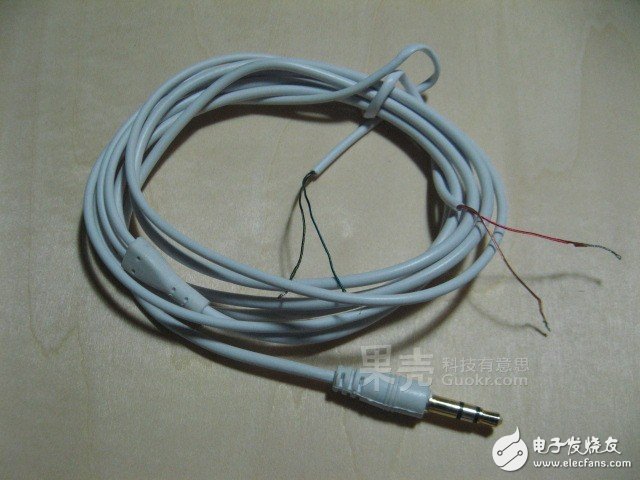
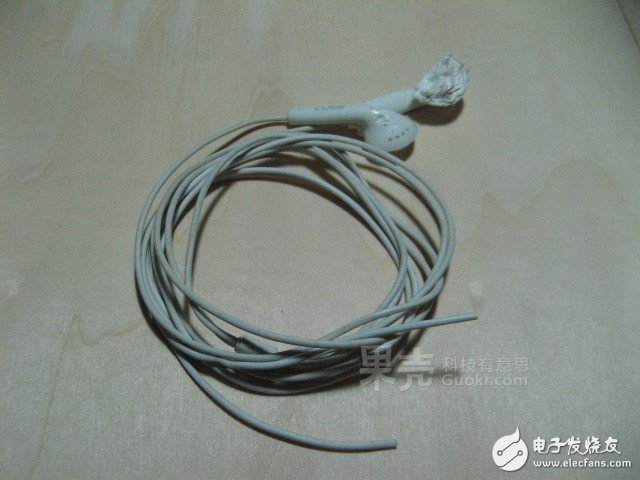
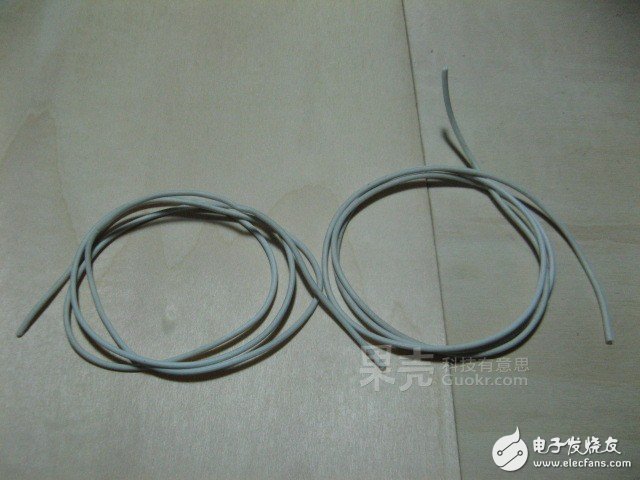
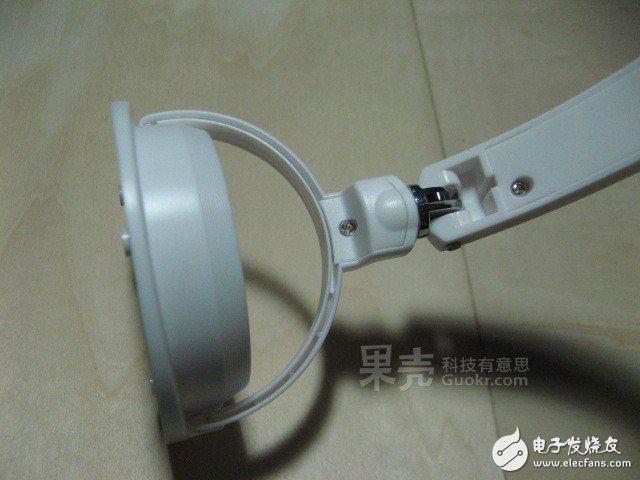
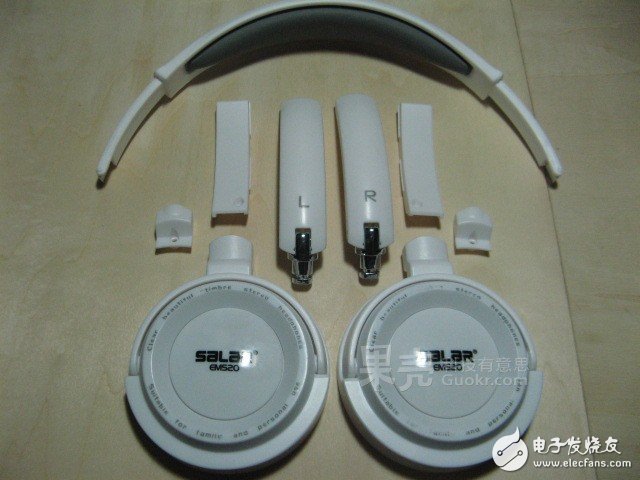
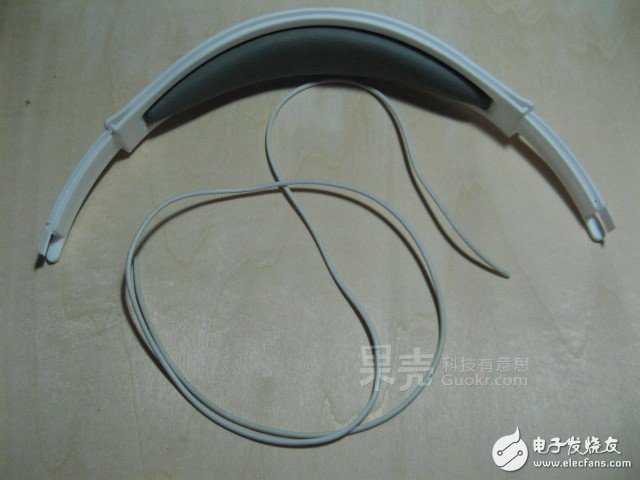
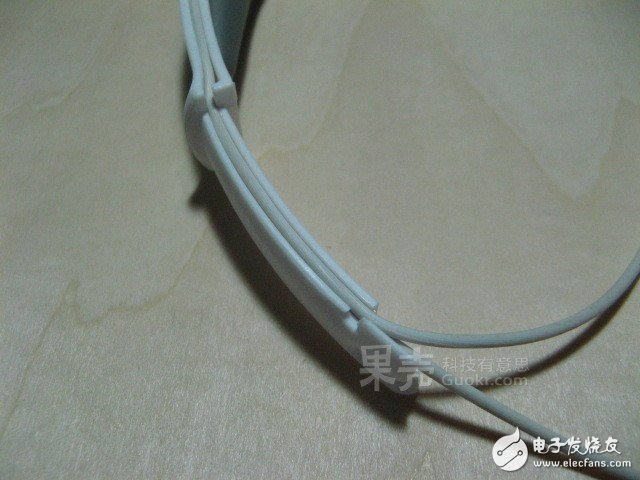
Bluetooth technology has gained widespread popularity due to its low power consumption, strong resistance to interference, and versatility in various communication environments. Additionally, its relatively simple integrated circuits make it an ideal choice for wireless interfaces, gradually replacing traditional cables. As a result, Bluetooth has become a standard feature in mobile phones, PDAs, MP3 players, and computers. One of the most common applications is using Bluetooth headsets to enjoy high-quality music and make hands-free calls from these devices. Beyond technological advancement, cost also plays a crucial role in adoption. Bluetooth headsets are available at a wide range of prices, from a few hundred to several thousand dollars, while most mobile phones cost under a thousand. This price disparity means that Bluetooth headsets have not yet achieved the same level of market penetration as mobile phones. If you're interested in building your own, here's a step-by-step guide to making a DIY Bluetooth headset. Disassemble the Original Headphones Start by carefully removing the earcups. Avoid pulling too hard or damaging the stitching. Take your time to avoid unnecessary damage. Next, remove the three securing screws and gently take out the speaker unit. Keep the screws inside the earcups to prevent them from getting lost later on. Solder the original audio wires and remove them, leaving only the outer casing and the speaker part. Connect the left and right sections using an old headphone cable. Since the left and right sides of the original headphones are independent, there’s no direct wiring between them. To build this project, you’ll need to separate the battery and Bluetooth module on each side and connect the left channel output from the right Bluetooth module using an audio cable. On the left side, you can use an old pair of headphones to extract the audio cable. This pair of headphones was disassembled, but the cable remains intact and usable. The reason we’re not using the original cable from this pair is that it’s too thick and difficult to route. Instead, we'll use a thinner cable from a regular pair of earphones. Cut two equal-length cables, approximately twice the length of the earcup. Disassemble the hinge and telescoping parts of the headphones. Be careful not to force anything open. If it doesn’t come apart easily, check if a screw has been removed and try different angles and directions. Forcing it may damage the structure. Once fully disassembled, the hinge and telescoping section will be completely separated. Begin with the hood section and prepare the wiring. As shown in the image, when the headphone cable is inserted into the hood, it becomes clear that the design includes a built-in cable routing system. The cable fits neatly, and even the folding and telescoping parts have slots for wire management, making this project much easier. Kevlar Braided Sleeve is a type of protective covering made from Kevlar fibers that are woven together in a braided pattern. It is commonly used in various industries for its high strength and resistance to abrasion, punctures, and cuts. Kevlar Fiber Sleeve,Kevlar Cable Sleeve Cover,Kevlar Braided Cable Sleeving,Kevlar Braided Sleeving Dongguan Liansi Electronics Co.,Ltd , https://www.liansisleeve.com